
How to Wrap Text in Google Sheets: Tips and Fixes Made Easy
Struggling to wrap text in Google Sheets? Follow this guide for simple tips and fixes to format cells effortlessly.


Messy data can make even simple tasks feel frustrating, especially when text overflows or gets hidden. Text wrapping in Google Sheets helps keep content visible within its cell, ensuring better readability and organization.
By allowing text to adjust automatically, you can maintain a clean layout without constantly resizing columns or rows, making it easier to navigate and interpret your data.
Whether you’re formatting reports, managing inventories, or handling large datasets, understanding how to wrap text can make your spreadsheets more user-friendly and professional.
This guide will walk you through text wrapping techniques, explore advanced features, and troubleshoot common issues so you can work confidently with your data.
What Is Text Wrapping?
Text wrapping in Google Sheets is a formatting feature that adjusts how text appears within a cell. When text in a cell is too lengthy to fit within its width, it may overflow into adjacent cells or get cut off, making it difficult to read.
By enabling text wrapping, the content automatically moves to the next line within the same cell if it exceeds the cell's width. This keeps the text visible without resizing or overlapping, making it ideal for managing lengthy entries like descriptions, notes, or detailed data. Text wrapping ensures that your spreadsheet remains neat and easy to navigate.
Benefits of Text Wrapping in Google Sheets
Enabling wrapped text offers various practical benefits, from improving clarity and efficiency to ensuring a professional presentation. Below are some reasons why this feature is invaluable for managing data effectively.
Enhances Readability and Efficiency
Text wrapping ensures that content remains easy to read by preventing it from spilling over cell boundaries. It eliminates the need for manual line breaks, saving time and effort. Additionally, wrapped text adapts seamlessly to various devices and screen sizes, maintaining readability and improving the overall user experience.
Organized Spreadsheets
Using text wrapping keeps your spreadsheets visually structured, making them easier to navigate and interpret. Ensuring data is neatly contained within cells minimizes horizontal scrolling and promotes faster analysis. This cohesive presentation style helps viewers quickly grasp key insights and enhances the overall organization of your data.
Ensures Complete Data Visibility
One of the key benefits of text wrapping is that it keeps all cell content visible, regardless of its length. Preventing text from being truncated or hidden ensures that crucial details like addresses, descriptions, or notes remain accessible. This enhances readability and simplifies data management, making it easier to work with comprehensive information.
Enhances Professional Data Presentation
A neatly formatted spreadsheet with wrapped text showcases professionalism and precision. By ensuring that all data is well-organized and easy to read, text wrapping creates a polished appearance. This attention to detail reflects positively on your work, leaving a lasting impression on colleagues, clients, or stakeholders.
Exploring Advanced Text Wrapping Features in Google Sheets
Advanced text wrapping features in Google Sheets offer additional customization options to enhance data presentation. These features include conditional formatting, text clipping, and overflow, allowing tailored formatting for specific needs.
Conditional Formatting
Conditional formatting allows you to highlight cells with text wrapping applied, making it easier to manage and organize large datasets. By visually identifying wrapped cells, you can quickly spot areas requiring attention or updates. This feature streamlines data management and ensures consistency across your spreadsheet for improved usability and clarity.
Clip Text-Wrapping Option
The clip text-wrapping option in Google Sheets ensures that text remains within the cell's boundaries by truncating any content that exceeds the cell width. While the full text isn’t displayed, this option helps maintain a tidy and compact layout. It’s particularly effective for conserving space in spreadsheets where data length isn’t critical to visibility.
Overflow Text-Wrapping Option
The overflow text-wrapping option in Google Sheets displays text that extends beyond a cell’s width by allowing it to spill into adjacent empty cells. This option ensures all content is visible without resizing the cell. It’s especially helpful for quickly reviewing lengthy data without altering the spreadsheet layout or formatting.
Methods to Wrap Text in a Cell, Row, and Column in Google Sheets
For better readability, wrapping text in Google Sheets can be applied to individual cells, entire rows, or columns. Here are simple methods to efficiently wrap text across different ranges.

Using the Format Menu to Wrap Text in Google Sheets
In Google Sheets, the Format menu is an effective tool for wrapping text. It allows you to apply text wrapping to specific cells, rows, or columns for better data presentation.
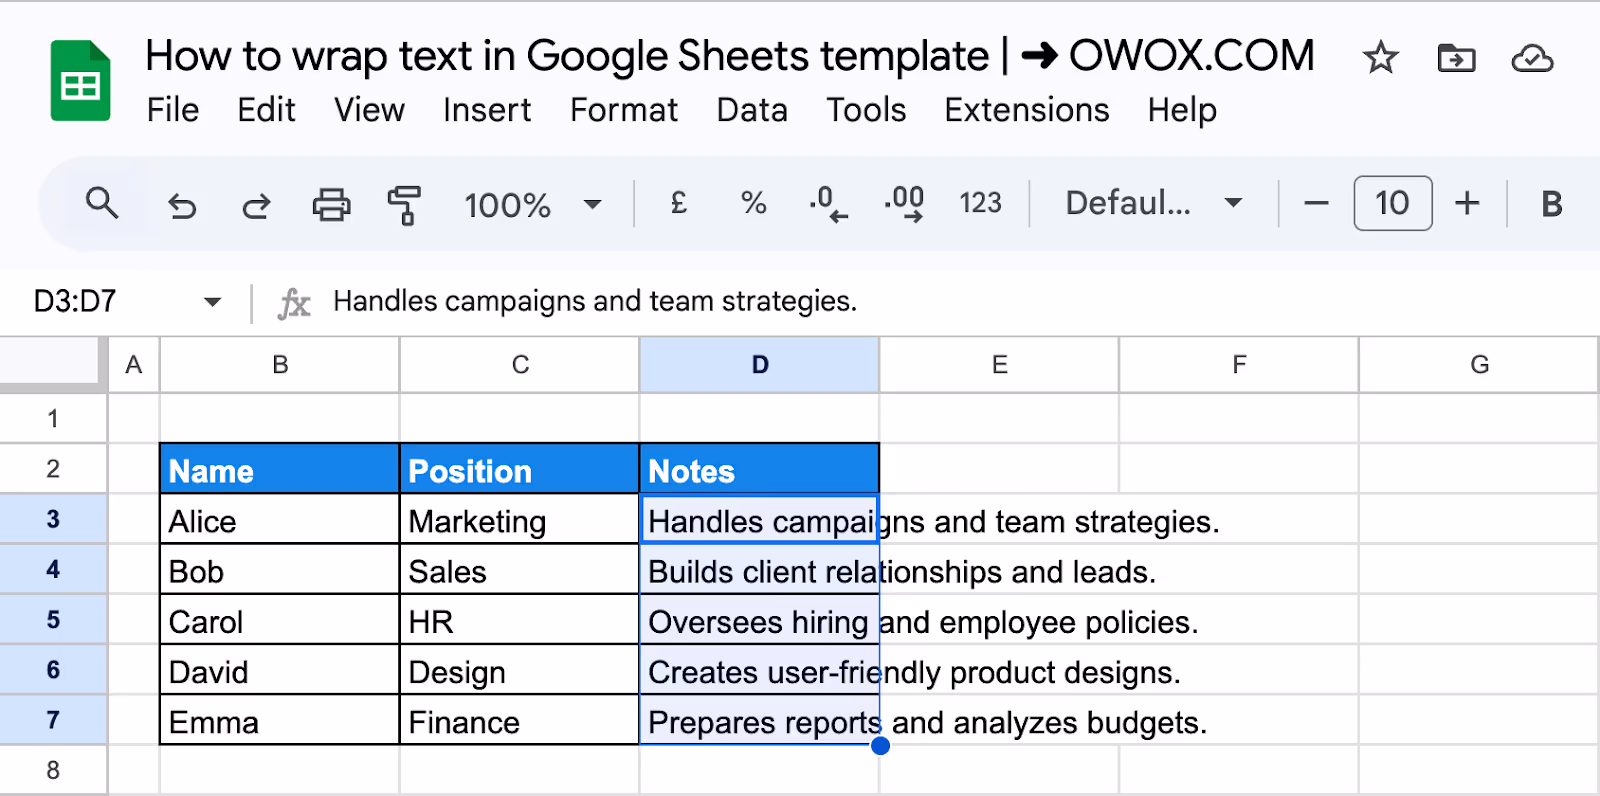
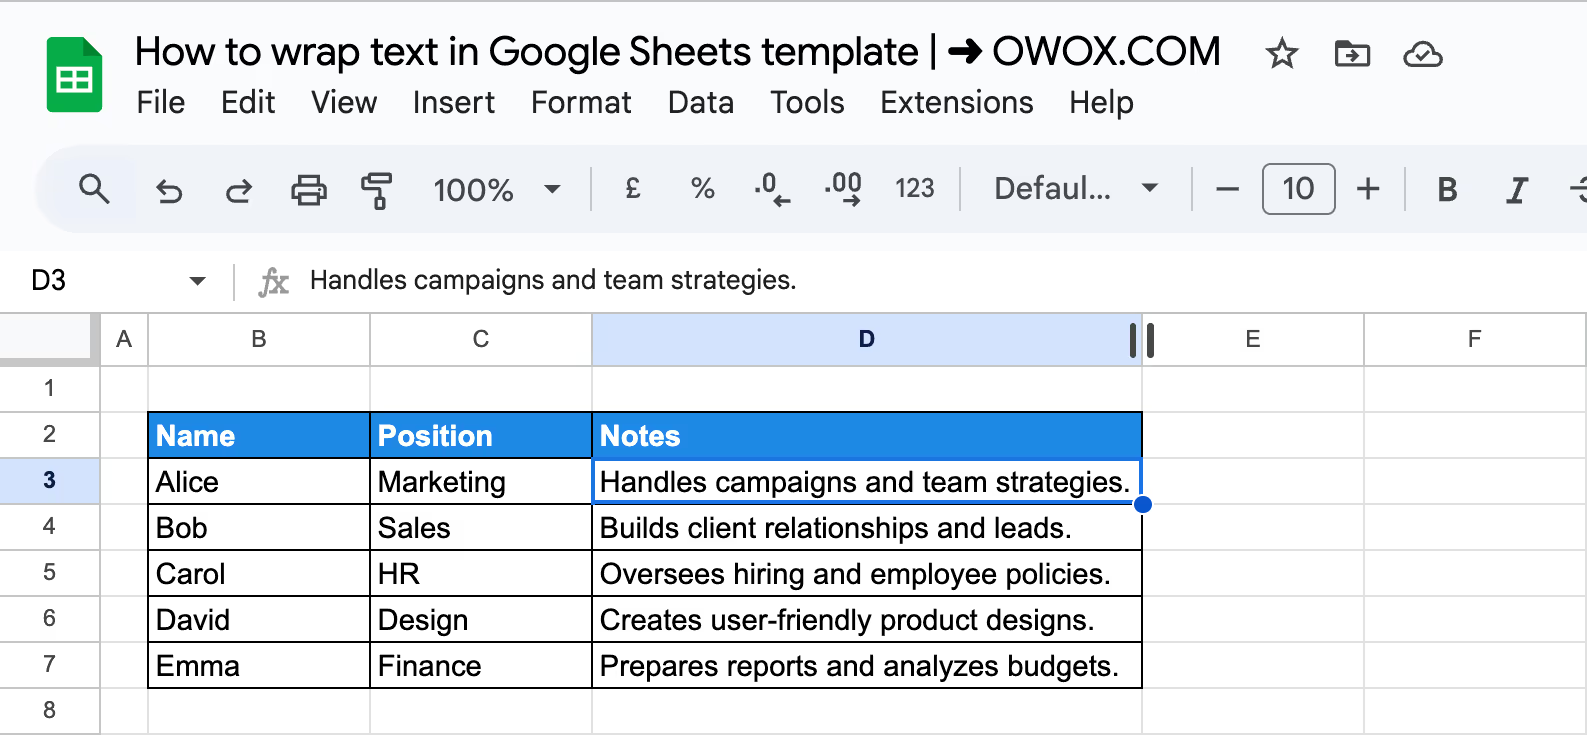
Step 1: Select the cells to format
Highlight the cell, row, or column where you want to apply the text wrapping feature for better visibility.
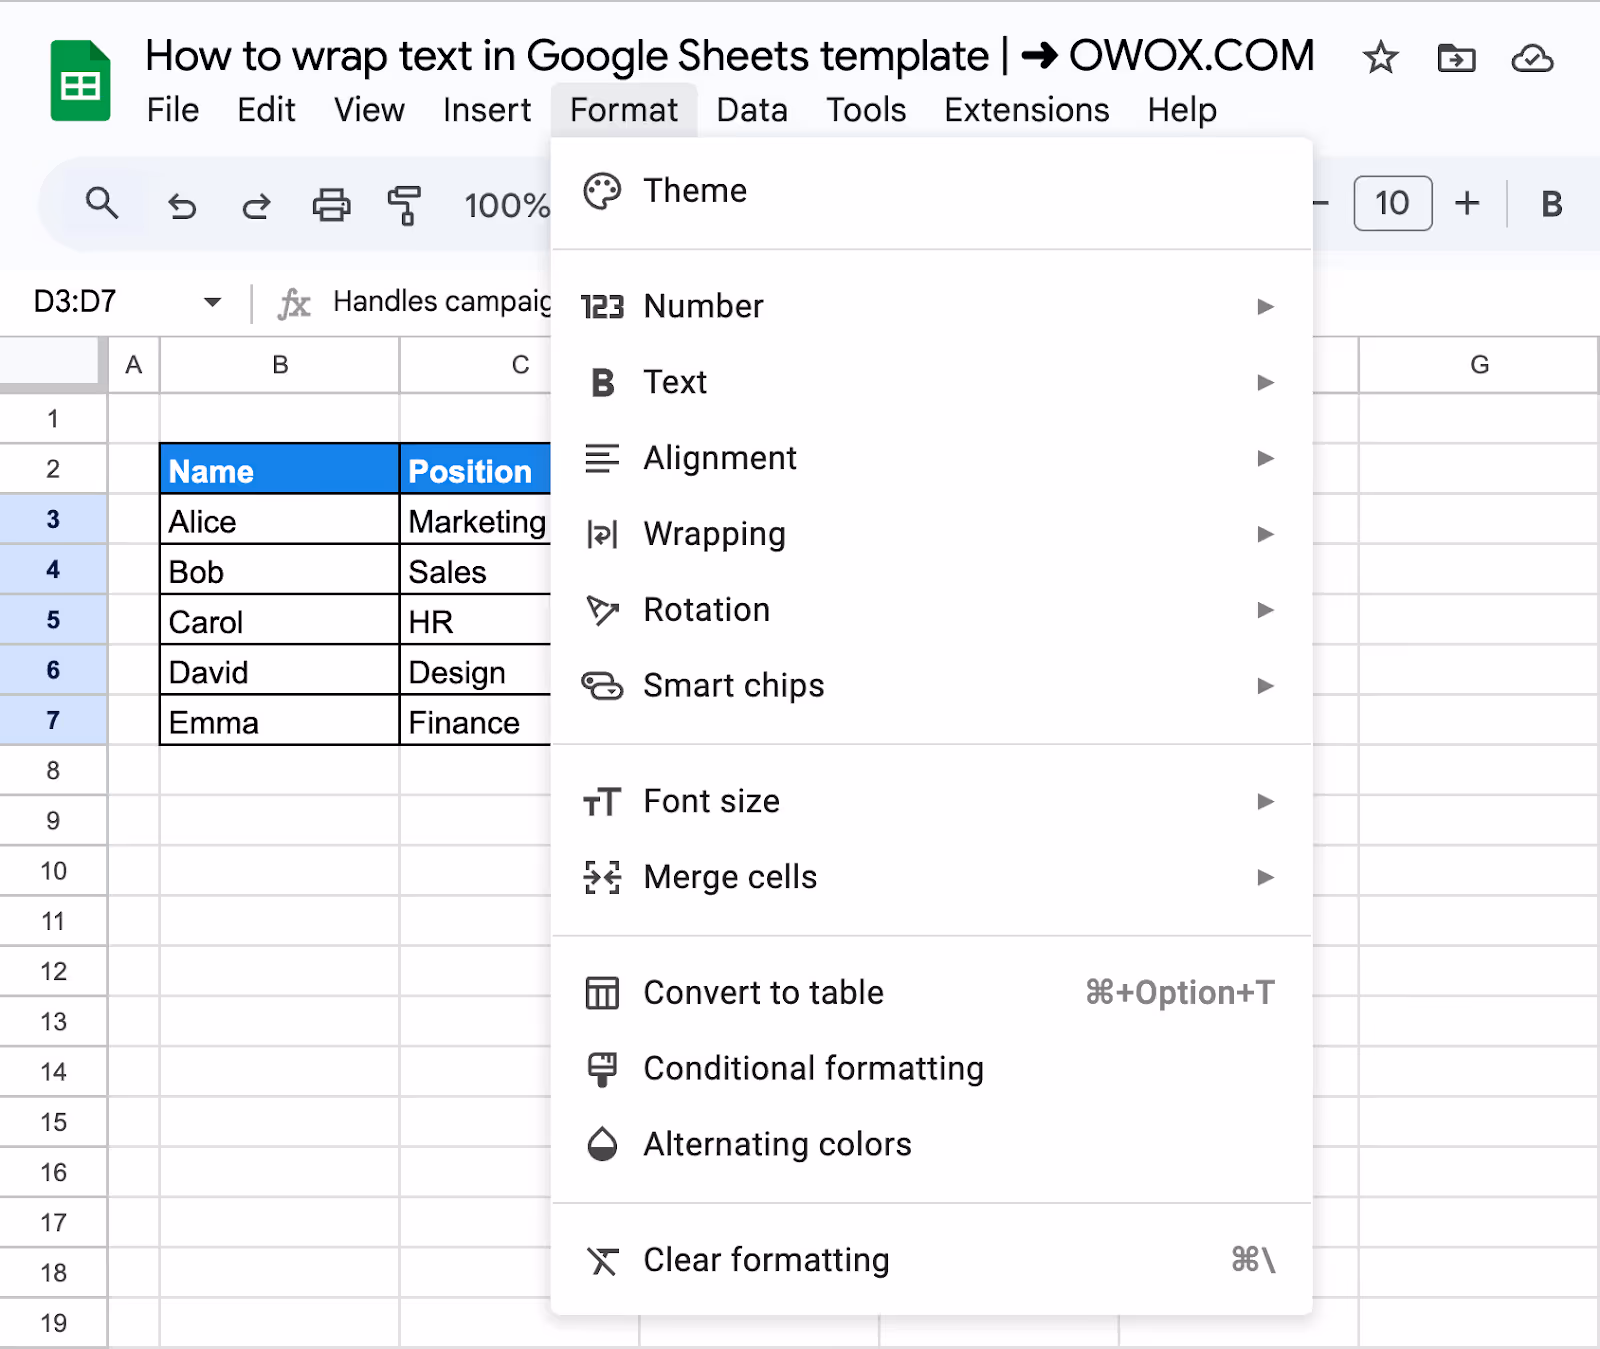
Step 2: Open the format menu
Navigate to the top menu bar in Google Sheets and click on Format to access the text wrapping options.
Step 3: Choose the wrapping option
From the dropdown, select Text Wrapping and then click Wrap to enable the text wrapping functionality for the selected cells.
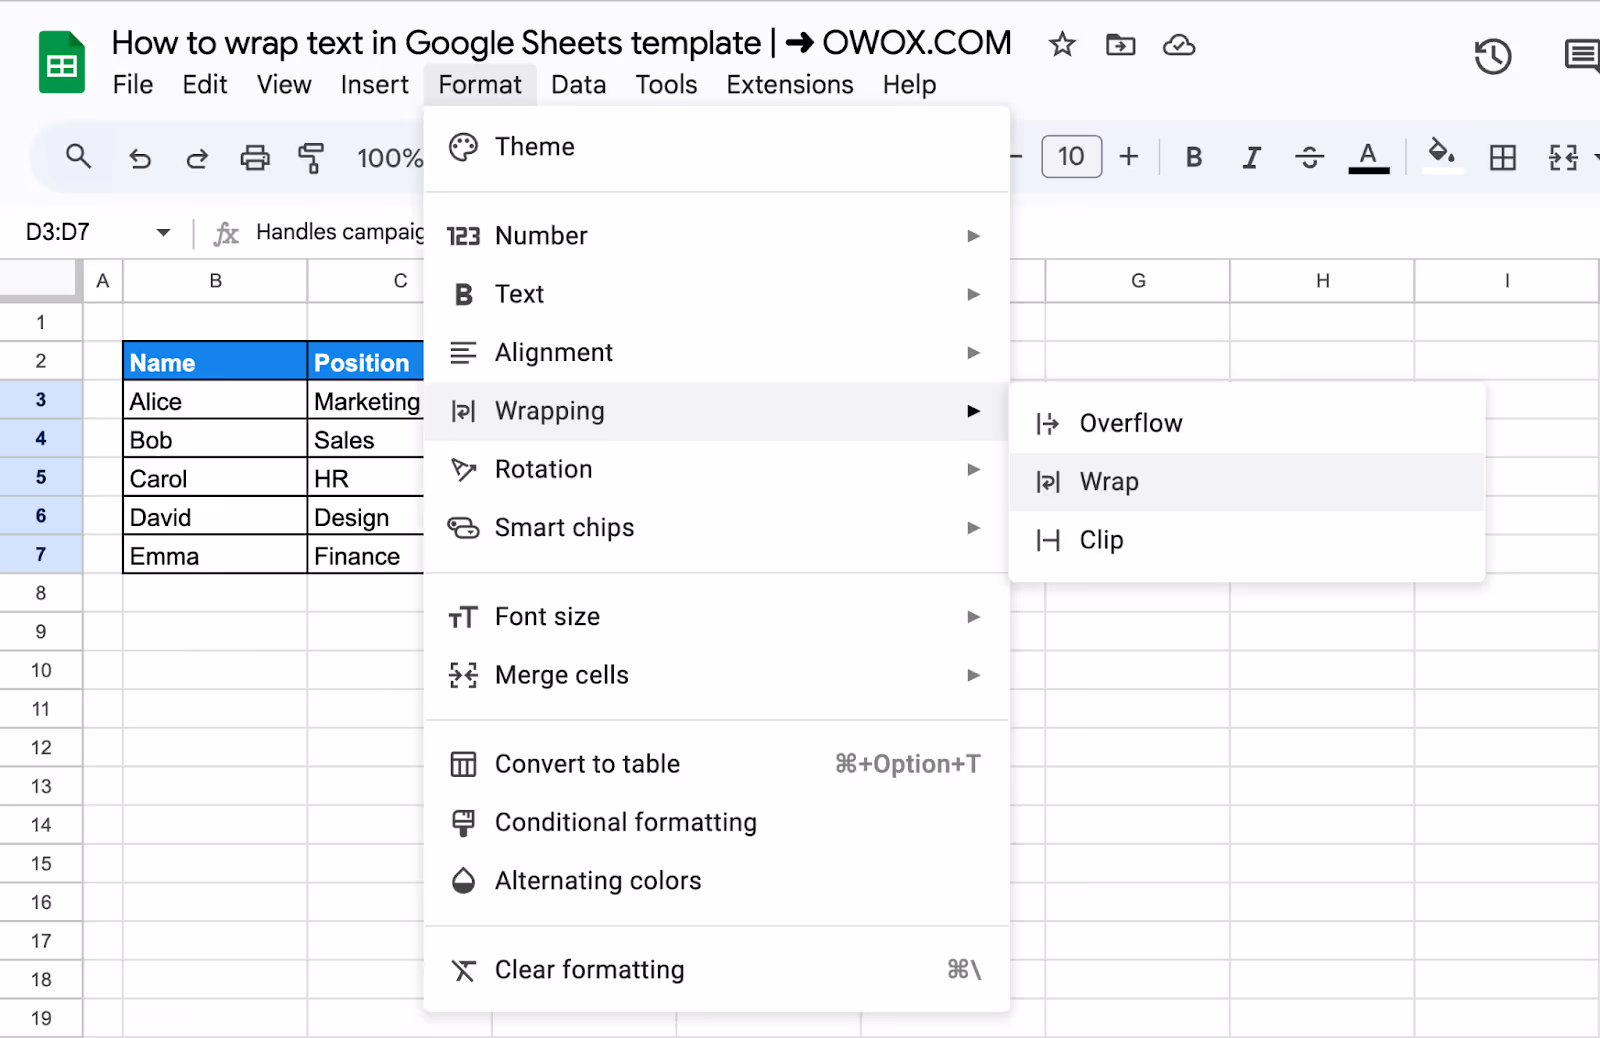
Step 4: Select “Wrap” to apply the text formatting.
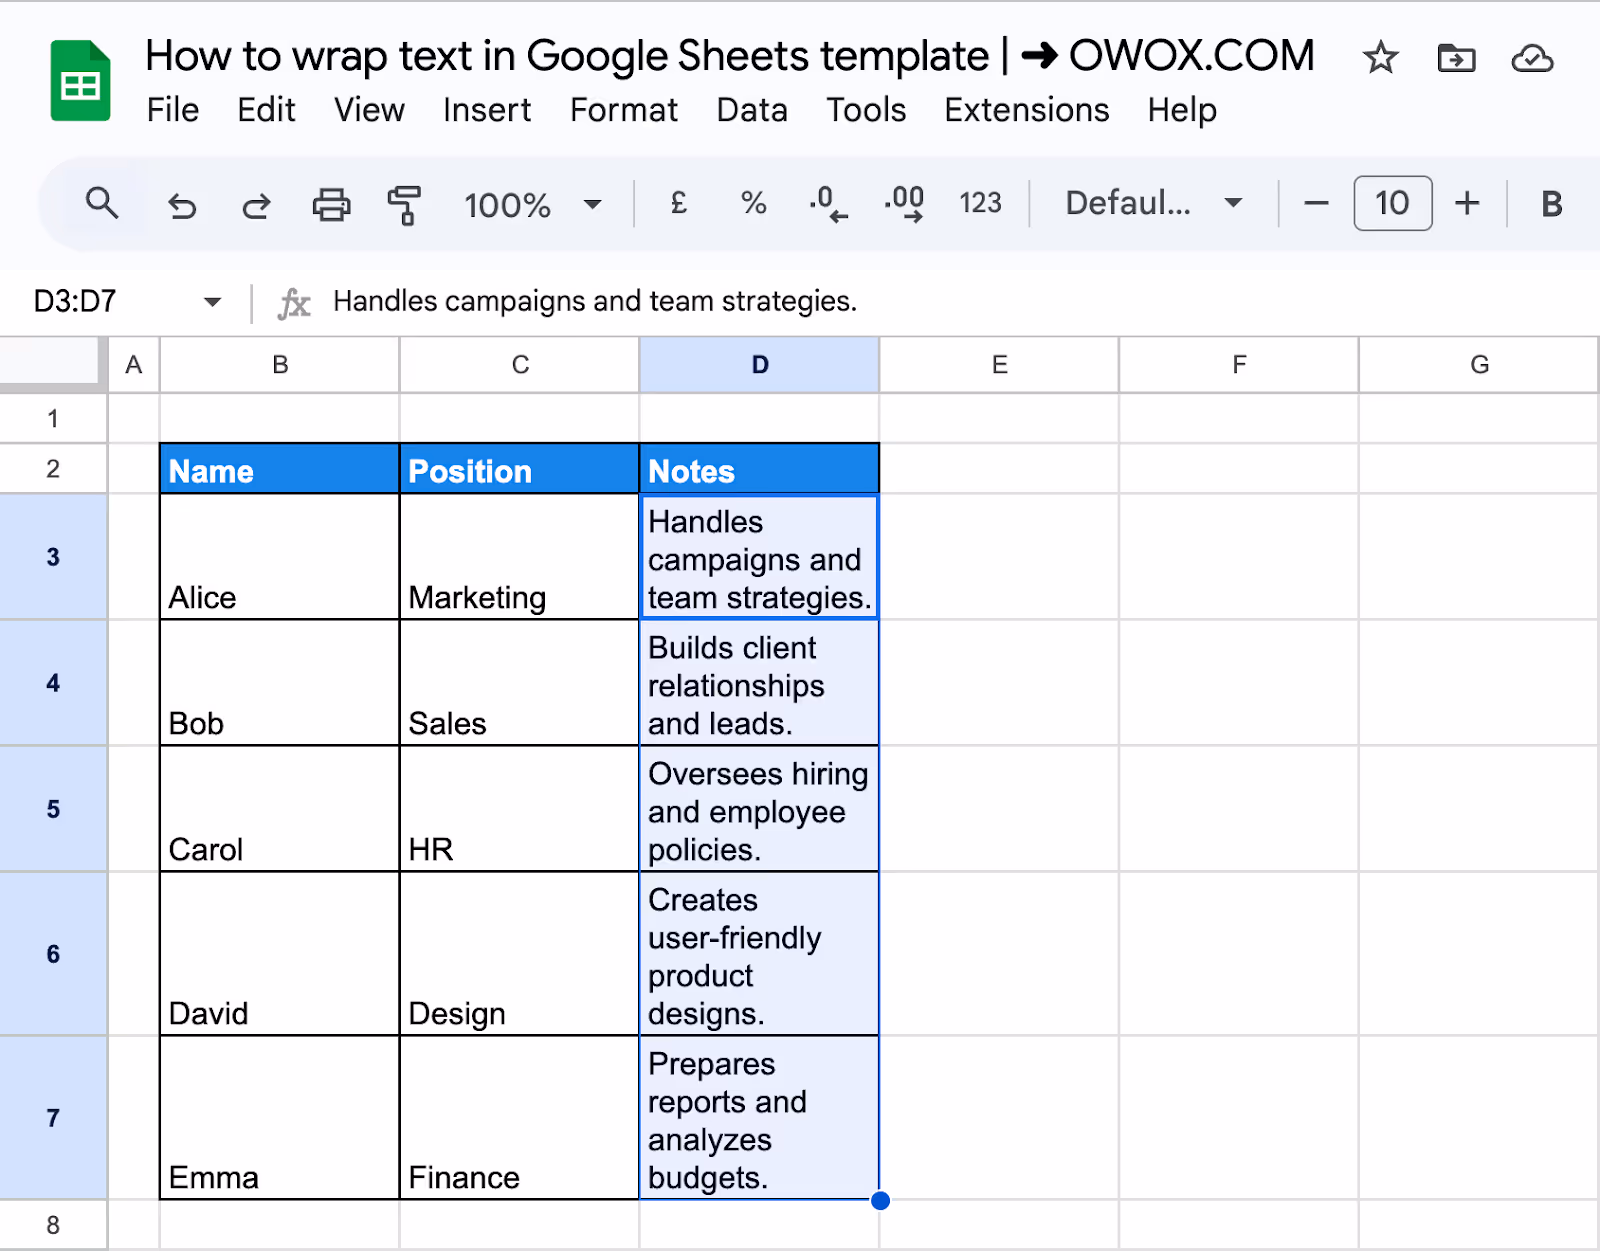
Once applied, the selected cells will display their text neatly wrapped within the boundaries of the cell.
Quickly Wrap Text in Google Sheets Using the Toolbar
Using the toolbar in Google Sheets is a fast and convenient way to wrap text, ensuring your data is easily readable.
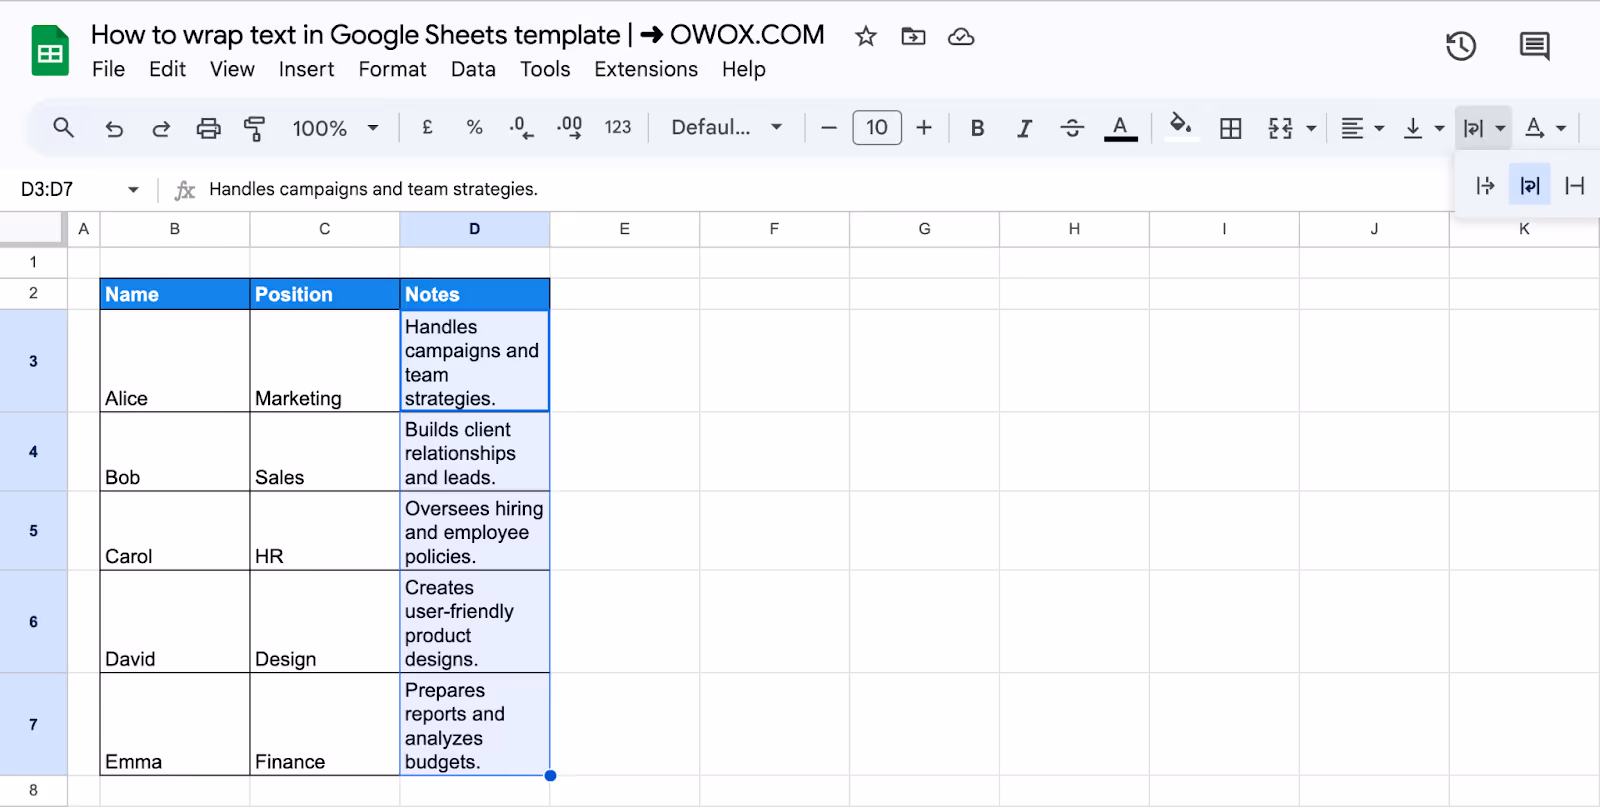
Step 1: Click on the "Text Wrapping" icon in the toolbar
Locate and click the text wrapping icon to access formatting options.

Step 2: Select the "Wrap" option to apply the formatting
Choose the "Wrap" option from the dropdown menu to enable text wrapping for the selected cells.
This method offers a faster alternative to the Format menu, letting you apply text wrapping with just a few clicks—perfect for quick formatting adjustments on the go.
Wrap Text Using the Keyboard Shortcut in Google Sheets
Keyboard shortcuts in Google Sheets make wrapping text faster and more efficient. Manually adding line breaks keeps your content neat, organized, and easy to read.
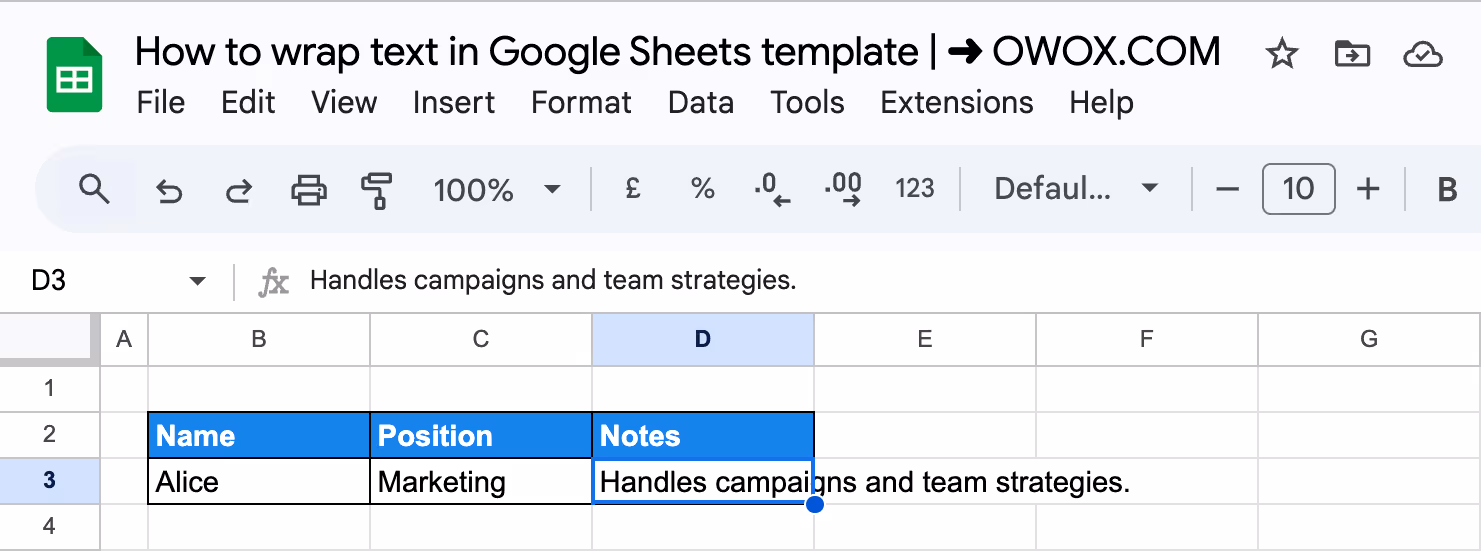
Step 1: Select the cell to wrap the text
Click on the cell where you want to apply text wrapping. Ensure the cell is active and ready for editing.
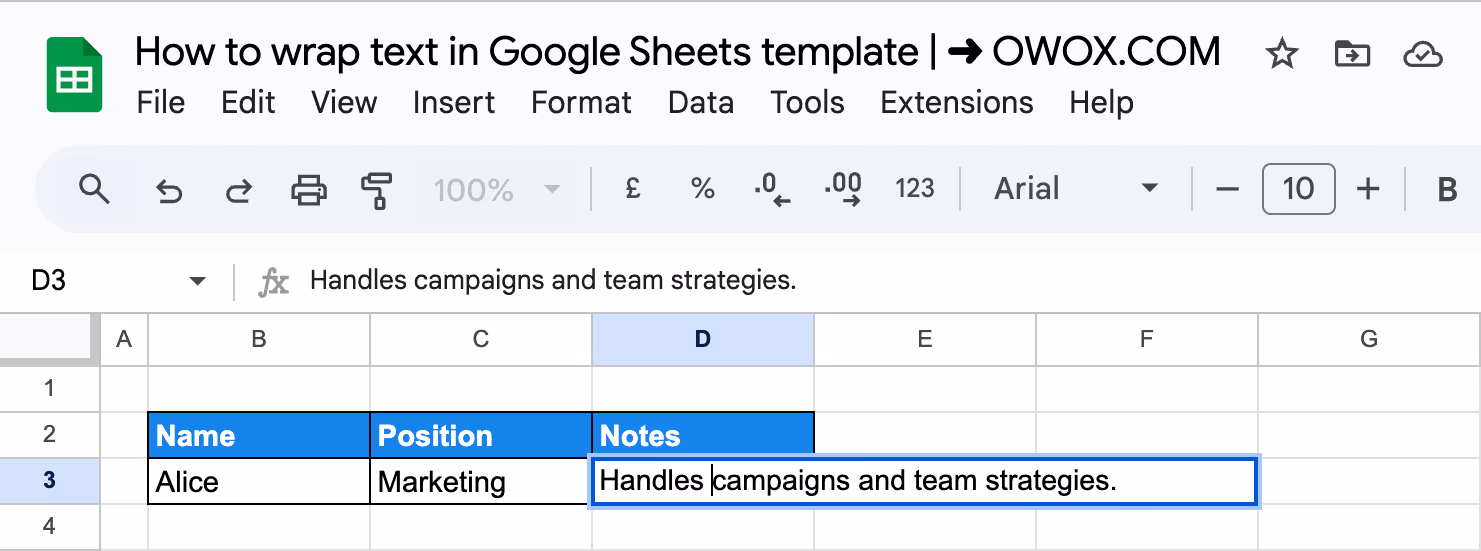
Step 2: Insert a line break in the cell
Place the cursor where you want to break the text, then press Alt + Enter (Windows) or Option + Enter (Mac) to add a line break.
Step 3: Add additional line breaks as needed
Continue pressing the shortcut keys at desired points in the text to create more line breaks, organizing the content for better readability.

Modifying Column Width to Wrap Text in Google Sheets
Adjusting column width in Google Sheets ensures that wrapped text fits neatly within cells. This method helps improve readability by automatically resizing columns to accommodate longer text entries effectively.
Step 1: Position the cursor to resize the column
Place the cursor on the boundary of the column header until it changes to a resizing icon.
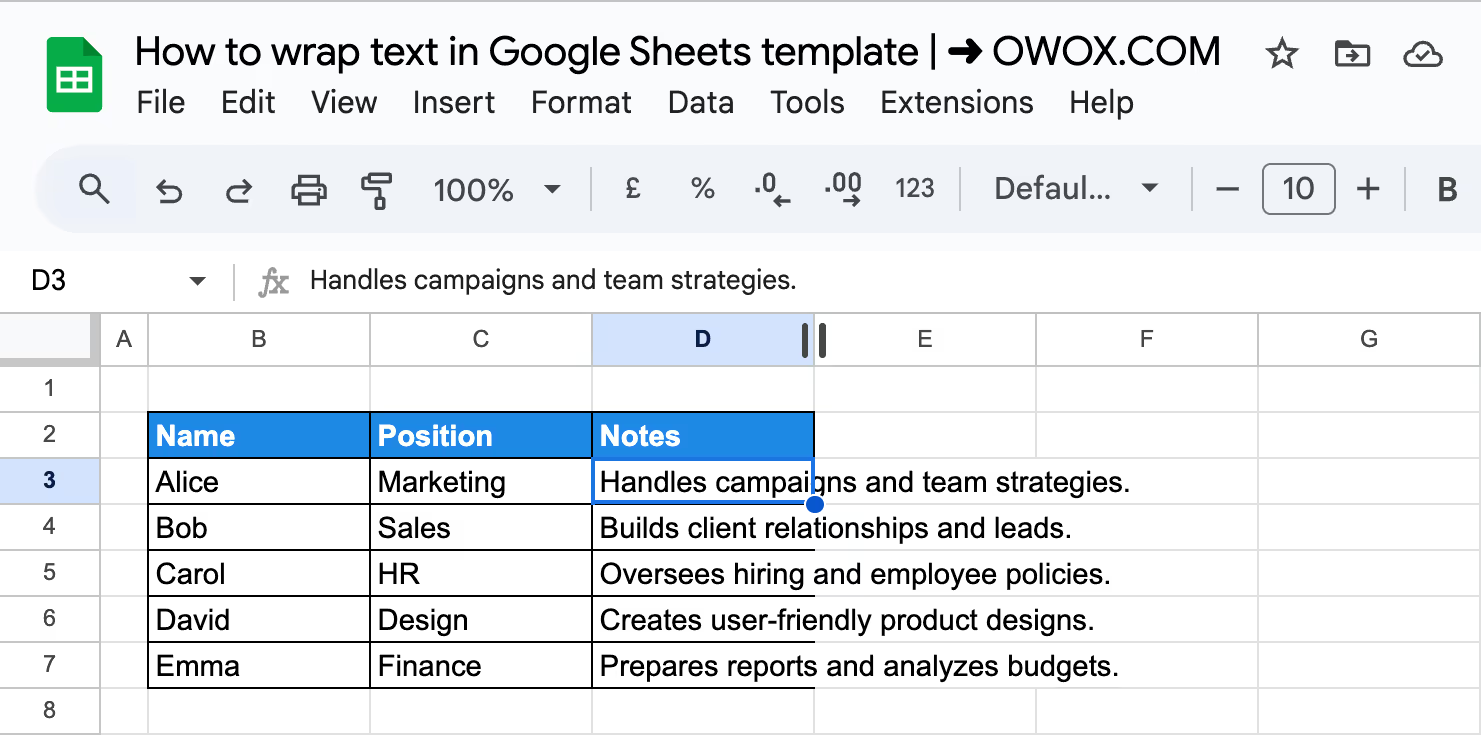
Step 2: Adjust the column width for automatic text wrapping
Drag the boundary to resize the column, ensuring that wrapped text fits properly within the cell and stays fully visible.
Using the Text to Columns Feature to Wrap Text in Google Sheets
The "Text to Columns" feature in Google Sheets allows you to split data in a single cell into multiple columns efficiently. This is especially useful when you have text separated by commas, spaces, or other delimiters and need to organize the data for further analysis or reporting.
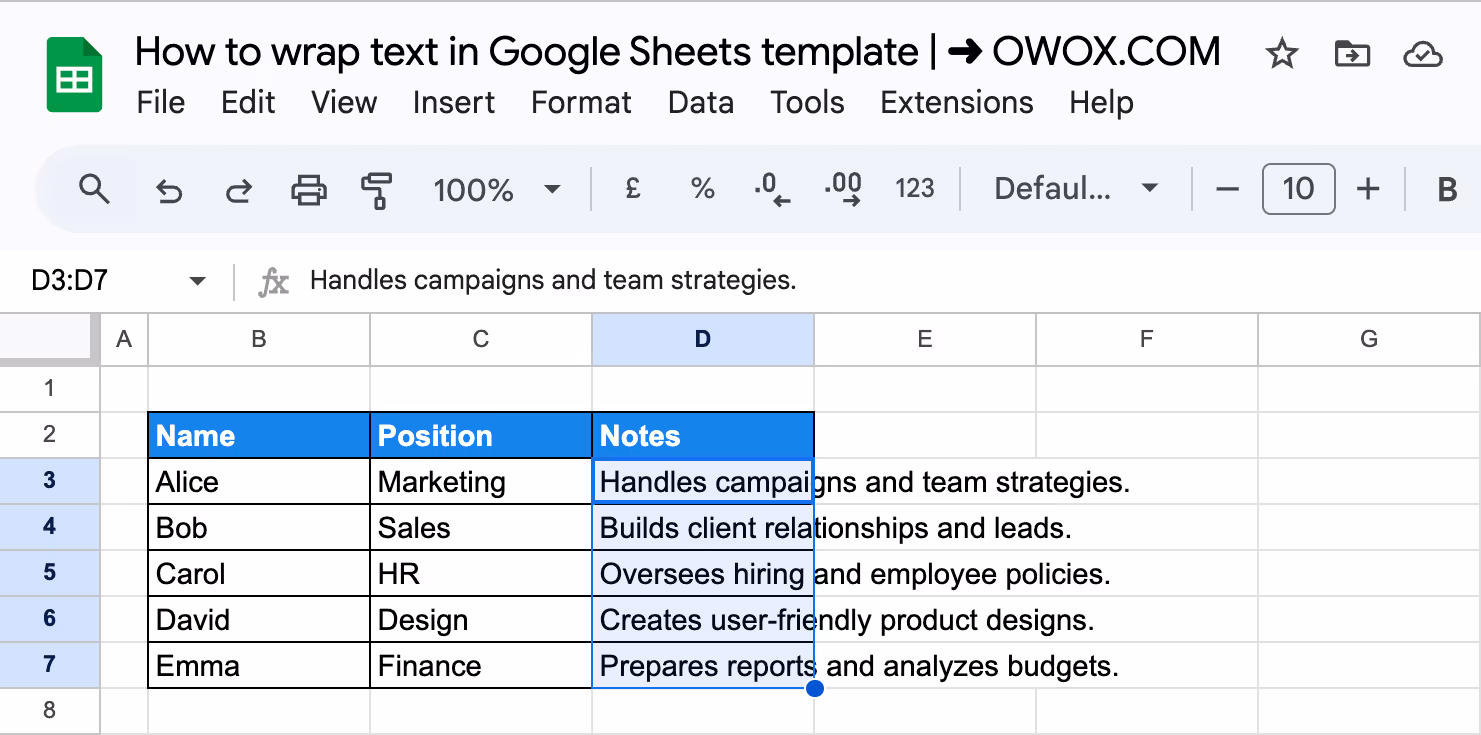
Step 1: Select the text you want to wrap
Highlight the cells containing the text that you want to split into columns based on specific separators.
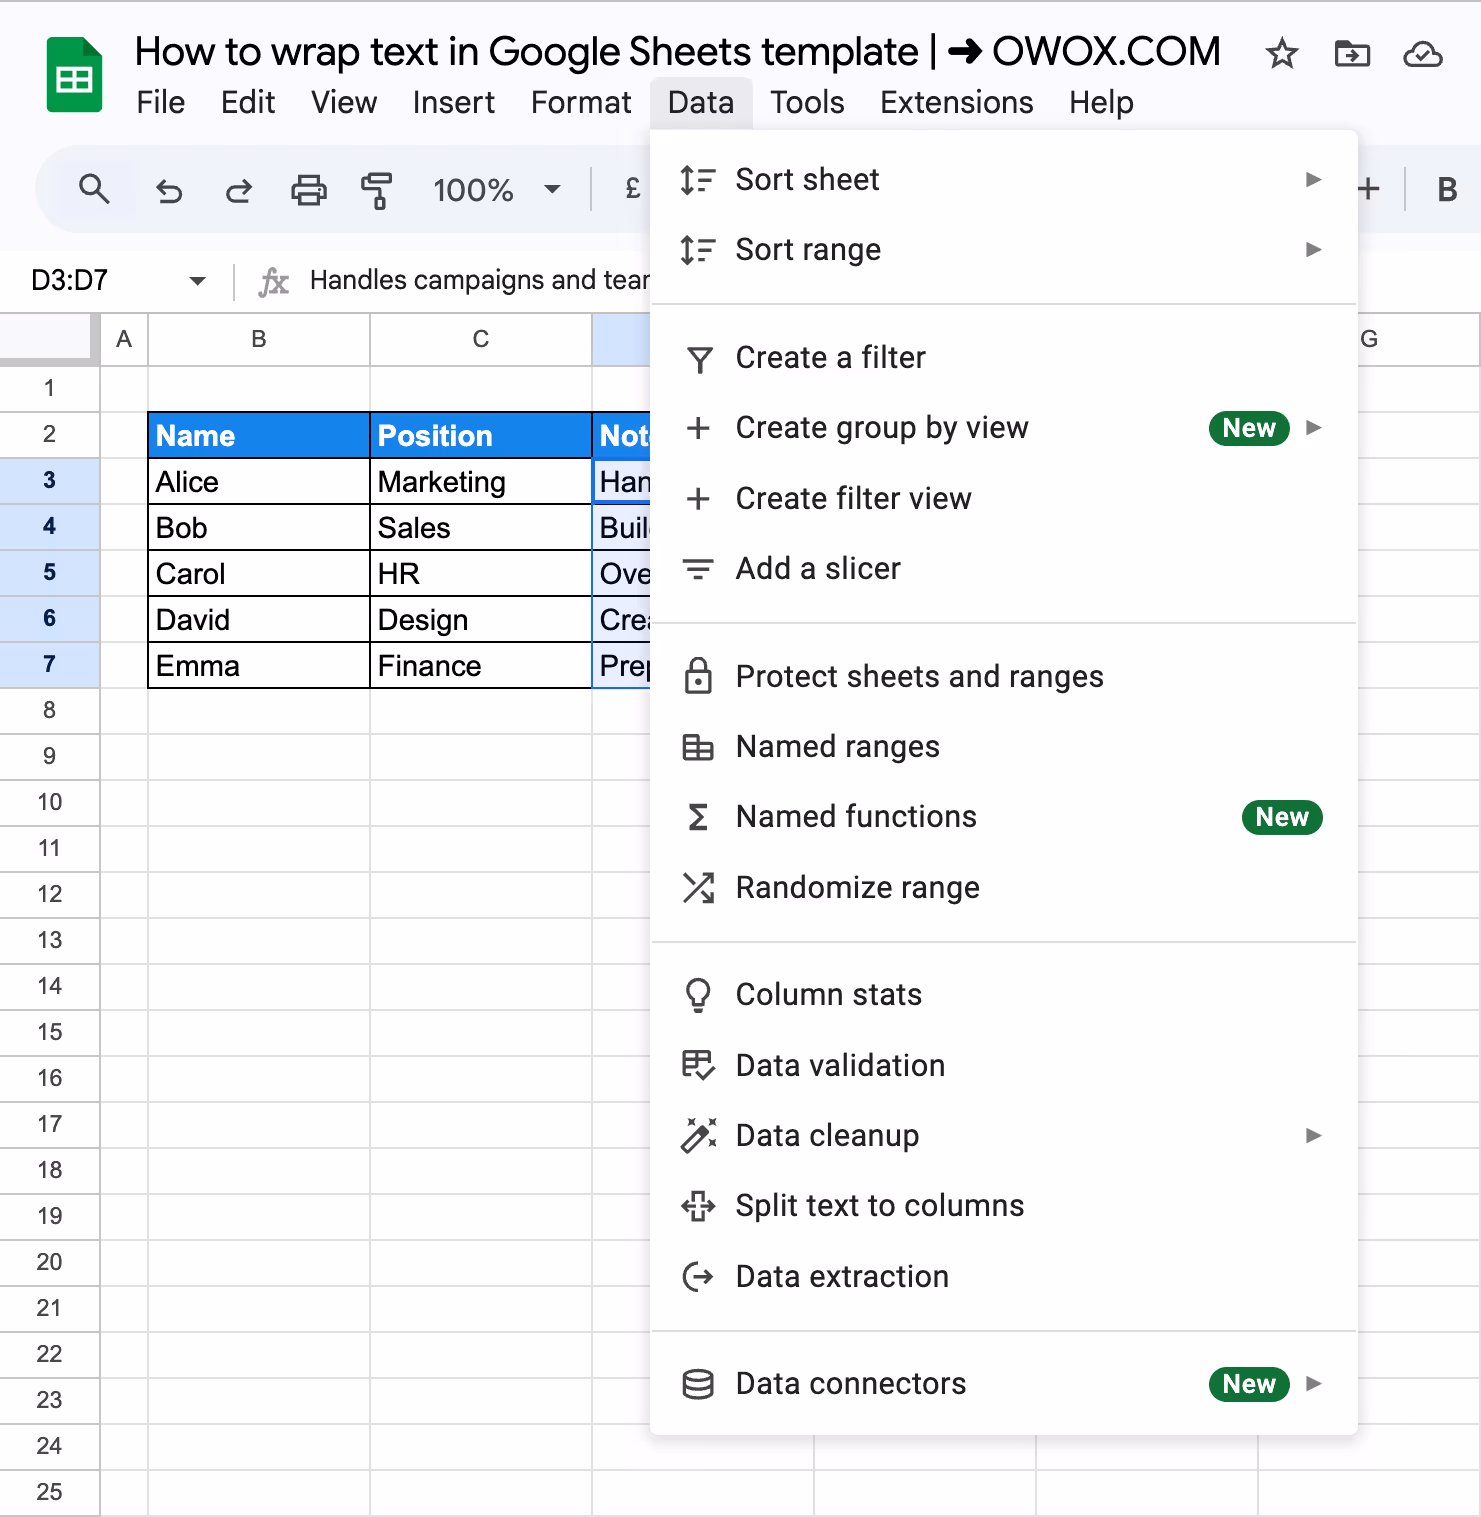
Step 2: Navigate to the "Data" menu
Go to the top menu bar in Google Sheets and click on Data to access the available data formatting options.
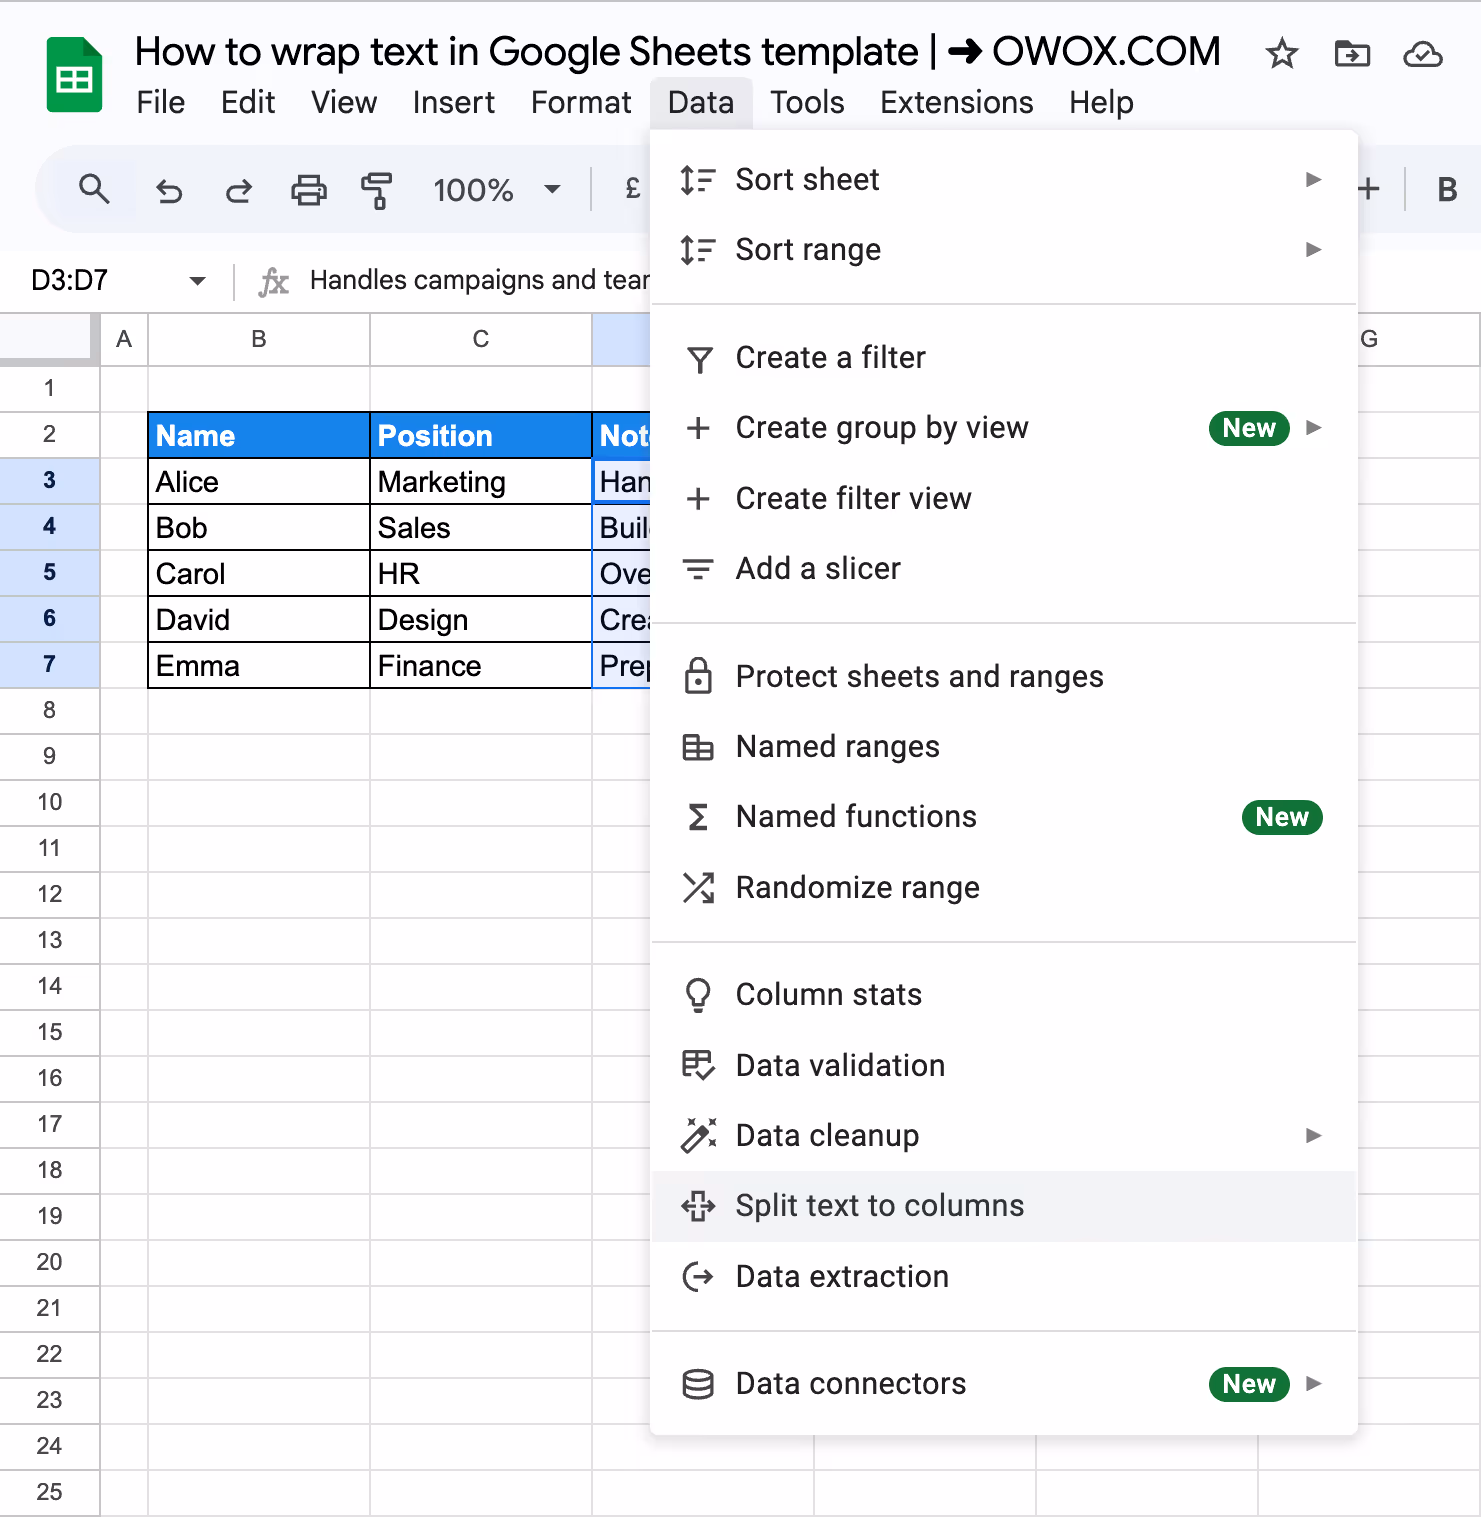
Step 3: Choose the "Split Text to Columns" option
Select Split Text to Columns from the dropdown to divide the text into multiple columns automatically.
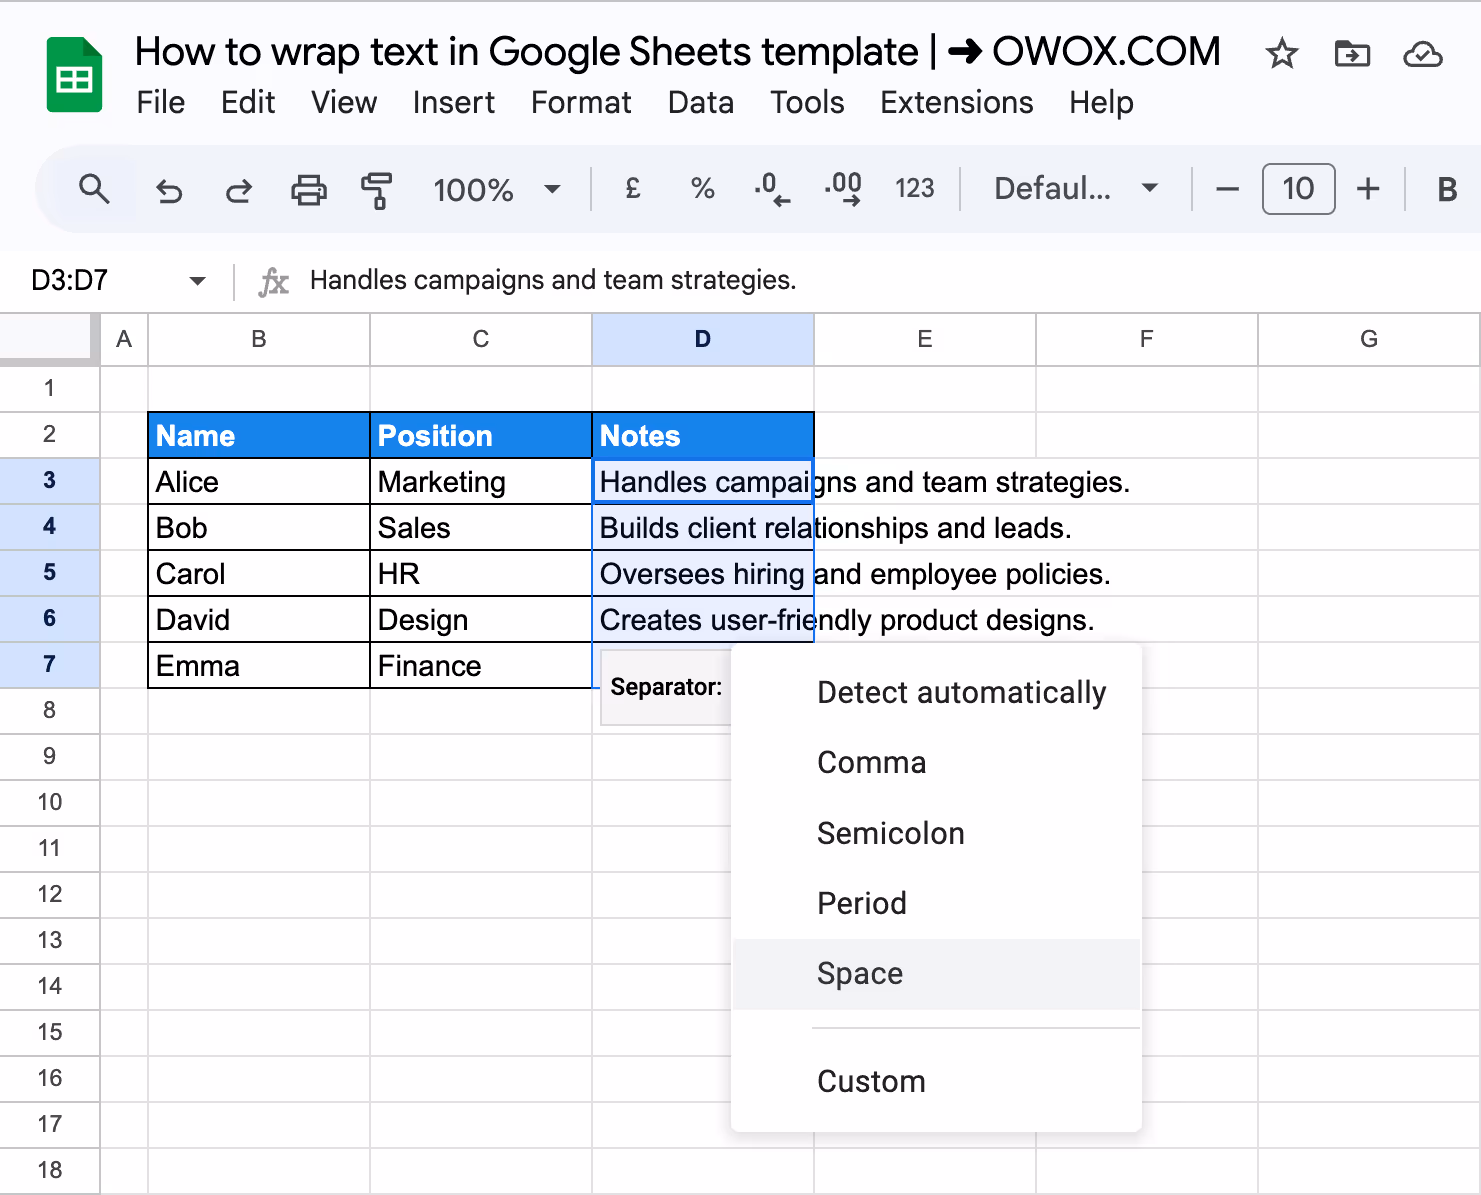
Step 4: Select a separator option
Pick the appropriate separator (comma, space, semicolon, or custom) to split the text correctly into individual columns.
The text is split into separate columns.
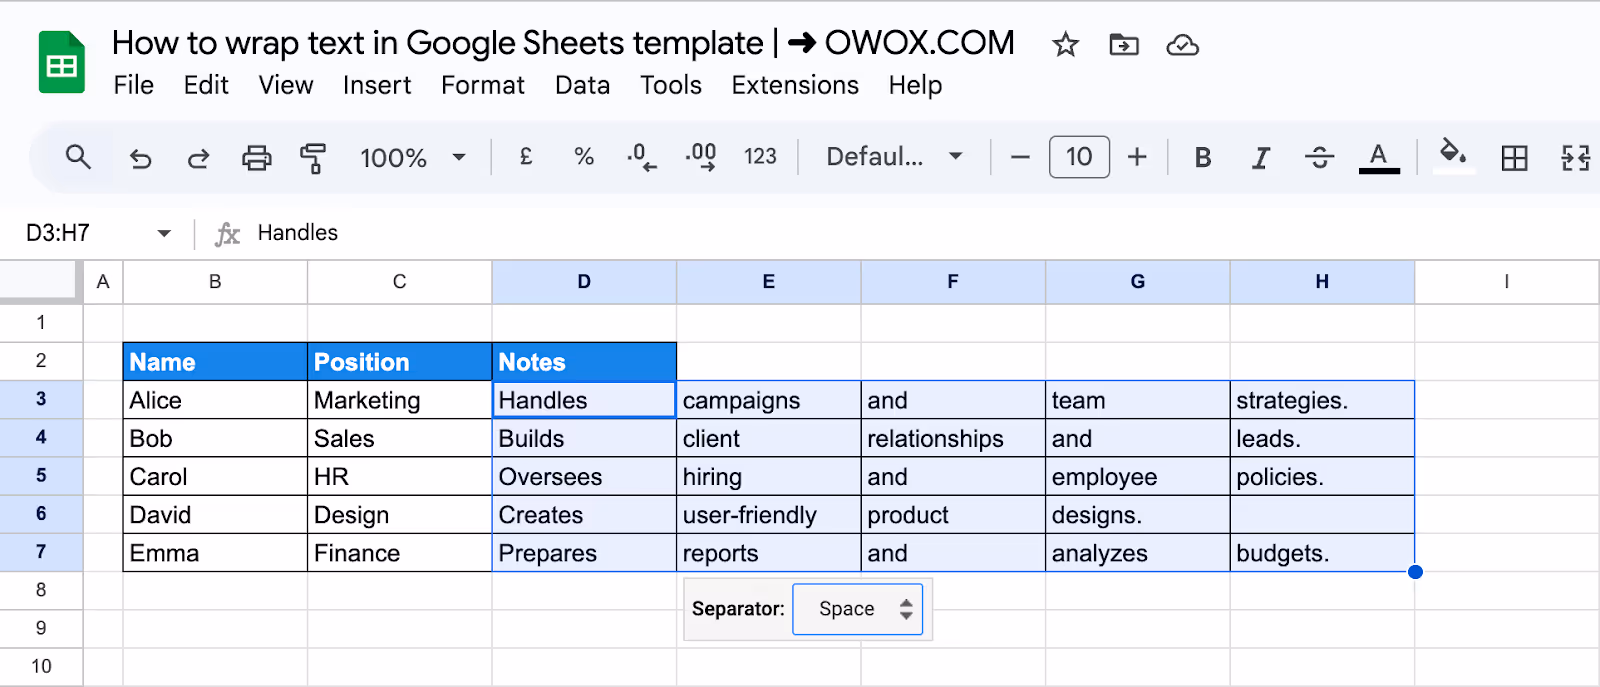
One drawback is that it splits your text into multiple cells, which may not be ideal for maintaining data integrity. Additionally, reversing the split can be challenging if you're unsatisfied with the result. It may also cause issues when working with text that contains natural spaces in essential places, such as names or addresses.
How to Fix Common Text Wrapping Issues in Google Sheets
Addressing common text-wrapping issues in Google Sheets is essential for maintaining a polished and functional spreadsheet. You can enhance data presentation by identifying and resolving problems like overflow or alignment errors.
Text Not Wrapping Properly
⚠️ Issue: Text wrapping isn’t working correctly in Google Sheets, even when enabled, due to formatting issues.
✅ Solution: Verify that text wrapping is enabled (Format > Text Wrapping > Wrap). If the issue persists, adjust column width or row height to prevent cramped text. Also, check for hidden characters or extra spaces, as these can disrupt wrapping. Making these adjustments ensures clear and professional data display.
Overflow Issues
⚠️ Issue: Text overflows in Google Sheets when it exceeds a cell's boundaries, spilling into adjacent cells.
✅ Solution: Fix this by resizing column widths or row heights to fit the content or enabling text wrapping (Format > Text Wrapping > Wrap). For headings or labels spanning multiple columns, merge cells to create a cleaner layout, improving readability and organization.
Text Wrapping Not Optimized for Mobile
⚠️ Issue: Text wrapping on mobile devices can cause readability issues due to large fonts, excessive padding, or long words forcing text onto multiple lines.
✅ Solution: Reduce font sizes, adjust padding to minimize spacing, and break long words into shorter segments. These tweaks improve navigation and keep spreadsheets mobile-friendly.
Compatibility Issues with Imported Data Wrapping
⚠️ Issue: Imported data can cause compatibility issues in Google Sheets, affecting text wrapping and layout.
✅ Solution: Review the formatting of imported data and ensure it aligns with Google Sheets’ text wrapping settings. Adjust cell formatting as needed. Testing sample data before importing larger datasets helps identify and fix discrepancies for smooth integration.
Alignment and Spacing Challenges
⚠️ Issue: Misaligned text and inconsistent spacing in Google Sheets can affect readability and presentation.
✅ Solution: Use Format > Alignment to adjust vertical or horizontal alignment. While there are no direct padding options, manually adding spaces helps control text placement. For clarity, use ALT + ENTER to insert line breaks and improve readability.
Effective Ways to Use Text Wrapping in Google Sheets
Text wrapping in Google Sheets goes beyond simple formatting – it’s a valuable feature for organizing and displaying data. Here are effective ways to utilize text wrapping for better clarity and usability.
Use Keyboard Shortcuts for Text Wrapping
Keyboard shortcuts make text wrapping in Google Sheets quick and simple. Here are two handy shortcuts:
- Ctrl + Enter: Add line breaks within a cell for manual text wrapping.
- Ctrl + Shift + V: Paste the text into cells with automatic wrapping to fit the column.
These shortcuts ensure a faster and more efficient workflow while maintaining clean and organized spreadsheets.
Use Auto-Resize for Perfectly Wrapped Text
Combining text wrapping with the auto-resize feature ensures your content fits neatly within cells without manual adjustments. To use this feature, double-click the right edge of a column header, and Google Sheets will automatically resize the column to fit the wrapped text.
This is a simple yet effective method that saves time, enhances readability, and maintains a clean, organized spreadsheet layout.
Use Merged Cells Sparingly
Merging cells can make sorting and editing data more complex, so avoiding overusing this feature is best. Instead, use text wrapping to adjust longer text within individual cells, keeping your spreadsheet neat and manageable.
By minimizing merged cells, you ensure flexibility, better data handling, and improved compatibility with tools like filters and formulas.
Collaborating on Text-Wrapped Sheets
Effective collaboration on text-wrapped sheets ensures consistency and accuracy. Document clear text wrapping guidelines and share them with your team to standardize formatting. Use comments to provide feedback or instructions directly within the spreadsheet.
Additionally, version control should be implemented to track changes and revert if needed. These steps make teamwork on spreadsheets more organized and efficient.
Advanced Google Sheets Functions for Effective Data Analysis
Google Sheets offers a robust set of functions designed to streamline data analysis. These functions enable users to process complex datasets, identify patterns, and organize information efficiently, making advanced analysis more straightforward and effective.
- SEARCH: Finds the position of a specific substring within a text string, helping locate data or validate text entries.
- REGEX: Performs pattern matching and text manipulation using regular expressions, ideal for extracting, validating, or transforming data.
- CONCATENATE: Combines multiple text strings into one, simplifying the process of merging data from different cells or sources.
- ARRAYFORMULA: Applies a formula to an entire range of cells at once, automating calculations and improving efficiency for large datasets.
- COUNTA: Counts all non-empty cells within a range, making it useful for tracking data entries or identifying missing information.
- MATCH: Returns the relative position of a value in a range, making it an essential tool for lookups and comparisons in datasets.
Streamline Your Data Analysis with OWOX: Reports, Charts & Pivots Extension
OWOX: Reports, Charts, and Pivots extension transforms data analysis in Google Sheets by offering powerful tools for generating insightful reports, interactive charts, and dynamic pivot tables. It simplifies workflows, reduces manual tasks, and helps uncover actionable insights efficiently.
With easy integration into your data systems, OWOX ensures accurate and up-to-date reports. The intuitive interface allows effortless customization of charts and pivot tables, making it simple to convert raw data into meaningful, visually appealing insights for smarter decision-making.
Frequently asked questions


Finally, a tool that doesn't ask business users to learn a new dashboarding UI. Our marketing team already knows Sheets. OWOX just delivers the right data.
Joinable data marts concept was the thing that sold us. We can now use the semantic layer without building one.
Self-hosted the OSS version on Digital Ocean. Zero vendor lock-in. Contributed a Shopify connector back in week two.